When developing for WordPress locally on Windows, we need to have Apache, PHP and MySQL installed. There are web development environments available such as EasyPHP or WampServer, but I always prefer to install them manually. The experience you gain from it becomes useful when you encounter a problem with either PHP, Apache, or MySQL database as you will have a better idea where to look for the issues.
We will first install a PHP, then an Apache web server, and finally a MySQL database. We will also install the MySQL Notifier utility to manage the MySQL instances and phpMyAdmin tool, to manage MySQL databases. Finally, we will go through each step to install WordPress that will run on our localhost.
So let's get started.
1. Install PHP
WordPress is written in PHP which is a scripting language and we are going to install that first. On PHP official download page, there will be two versions available for download, ThreadSafe and NonThreadSafe. We will download the ThreadSafe .zip file.
Extract the ThreadSafe file somewhere on your computer and copy the folder to C: root partition. Currently, the latest PHP version is 8.x, so we will rename the folder to php8 to reflect the PHP version. The absolute PHP path will be as follows:
C:\php8
About the php.ini configuration file
The php.ini is a default PHP configuration file where we declare changes to the PHP behavior. The extracted files inside C:\php8 will not have the php.ini file. Instead, you should see two configuration files, php.ini-development and php.ini-production. The main difference is that in the development version, the warnings and errors are not hidden, so we will use that one.
We will make some changes to it and then save it as php.ini file.
Modify the php.ini file
Open php.ini-development in the text editor so we can make the following modifications:
- Extension directory
Find:;extension_dir = "ext"Change it to this:
extension_dir = "C:\php8\ext"We uncommented the line by removing semicolon
;at the beginning and added path toextfolder, which in our case isC:\php8\ext. This is the folder containing various PHP extension .dll libraries.By default, all these extensions are commented out, but we need to enable a few of them.
- openssl extension
Find the following line:;extension=opensslRemove the comment by removing semicolon
;so that the line looks like this:extension=opensslWe need openssl extension to be able to update WordPress plugins, otherwise, we get the "No working transports found" error discussed in this article.
- mysqli extension
We also need to enable mysqli extension for the MySQL library. Find this extension (it should be few lines aboveextension=openssl) and remove the comment so it will look like this:extension=mysqli - Other extensions
Some WordPress plugins also need other extensions to be enabled, such as curl and fileinfo extension, so you might also uncomment those, but for basic WordPress installation, mysqli and openssl extension is all we need. - upload_max_filesize and post_max_size directives
Let's also modify few more lines. Find the following:upload_max_filesize = 2Mand change it to
upload_max_filesize = 64MAlso find this line:
post_max_size = 8Mand change it to:
post_max_size = 64MIncreasing the value of upload_max_filesize and post_max_size directives will increase the allowed uploaded file and POST data in the PHP applications. We need this for example when importing a database using the phpMyAdmin tool. If the imported database file size is greater than the above specified-values, the import could fail with the message "phpMyAdmin - Error - Incorrect format parameter".
php.ini might not be enough. Check this article to learn how to enable cURL in Windows.We are finished with modifying the configuration file. Don't forget to save the changes as php.ini file!!
php.ini file while the Apache server is running, we need to restart the Apache server for changes to take effect.We are done configuring PHP, now let’s turn our focus to the Apache webserver.
2. Install Apache
Apache is a web server software that enables your computer to host websites. We can download Apache by going to Apache Lounge download page. Download the Win64 or Win32 .zip file, extract it and copy Apache24 folder into C:, so that the path is:
C:\Apache24
Configuring Apache
Now we need to configure Apache. Go to C:\Apache24\conf and open the httpd.conf in the text editor.
- Listen directive
Let’s first make sure the Apache will only listen to localhost. Find the following line. It should be at the start of thehttpd.conffile:Listen 80Change it to:
Listen 127.0.0.1:80This will make sure that the Apache listens only to requests from localhost and will ignore the external addresses.
-
DocumentRoot and Directory directive
Next, we need to set the root server folder inhttpd.conffile.
Find the following directives:DocumentRoot "${SRVROOT}/htdocs" <Directory "${SRVROOT}/htdocs">You can leave it as it is in which case the root server folder will be located at:
C:\Apache24\htdocsIf you prefer to have it somewhere else, change the path. For example, if you want it to be at
d:/www, you would change it toDocumentRoot "d:/www" <Directory "d:/www">Note: The folder separator in the path should contain forward slashes / instead of Windows backslashes \ - AllowOverride directive
Inside the<Directory>directive we just mentioned, find the following line:AllowOverride NoneChange it to this:
AllowOverride AllThis change is needed for WordPress due to
.htaccessfile that it uses. Without.htaccess, the WordPress permalinks will not work as discussed in this article. - DirectoryIndex directive
Next, we need to set theindex.phpas default page. Find the following line insidehttpd.conf:DirectoryIndex index.htmlChange it to:
DirectoryIndex index.html index.phpIn the above code, the
index.htmlwill have priority if bothindex.htmlandindex.phpexist on the same folder. - LoadModule and PHPIniDir directive
At this moment, Apache will not yet process the .php files. We still need to tell Apache, where the PHP is located. We do this by adding a PHP server module using the LoadModule directive. Inhttpd.conf, there is a big list of various LoadModule commands. First, find the mod_rewrite.so and remove#to uncomment it:LoadModule rewrite_module modules/mod_rewrite.soThis module will be needed when running WordPress and using permalinks.
Now we need to add a PHP module. Go to the end of the LoadModule list and add the following two lines at the end:
LoadModule php_module "c:/php8/php8apache2_4.dll"
PHPIniDir "c:/php8"
The path in LoadModule points to the
php8apache2_4.dllfile that is located inside thec:/php8.Note: If thephp8apache2_4.dllis missing inside thec:/php8, it’s possible you downloaded NonThreadSafe version of the PHP. Go back to Apache Lounge download page and download the ThreadSafe version.With the PHPIniDir directive, we can tell the Apache where the PHP folder is located. Apache will first try to look in default locations, such as
c:/php, but we have PHP installed atc:/php8. - AddHandler directive
Now we need to tell Apache which files should be processed by PHP. We do that by using AddHandler directive. Find the following line inhttpd.conf:#AddHandler cgi-script .cgiThis is just a comment, so leave it as it is. Below it, add the following line:
AddHandler application/x-httpd-php .php - ServerName directive
Find the following line:#ServerName www.example.com:80This is also just a comment. Below it, add the following line:
ServerName 127.0.0.1Without the ServerName directive, the Apache server might give you the following warning:
Error:
AH00558: httpd.exe: Could not reliably determine the server's fully qualified domain name
And we are done with modification of Apache configuration file. Save the httpd.conf file.
Start the Apache server
All that is left to do is to start the Apache server. Go to C:\Apache24\bin and run the httpd.exe file. A window with a command prompt should open and remain open.
httpd.exe then there is probably an error in the httpd.conf file. In this case open the command prompt (click search on Windows and type cmd), type cd c:\apache24\bin and once there, typehttpd.exe. Check the errors shown, fix them and try running httpd.exe again.Test the Apache web server
Now, let's test if the Apache server is really running. Open browser and go to http://127.0.0.1/ or http://localhost/. The browser should now show you the content of the folder that was set in DocumentRoot and Directory directives when we modified the httpd.conf file.
Let’s create a test php file to see if Apache does indeed support PHP. Open text editor, create a test.php file in the root server folder and add the following code:
<?php echo 'hello world' ?>
Save the file and go to http://127.0.0.1/test.php to run it. You should see the white page with the "hello world" message.
Starting Apache server by running c:\Apache24\bin\httpd.exe is not very efficient though. A better way is to run it as a service.
Run Apache as a service
First, close the Command Prompt window running httpd.exe if it is still opened from the previous step.
Next, we need to run a command prompt as an administrator. There are many ways to do this, one quick way is to type "cmd" in the Windows Search:
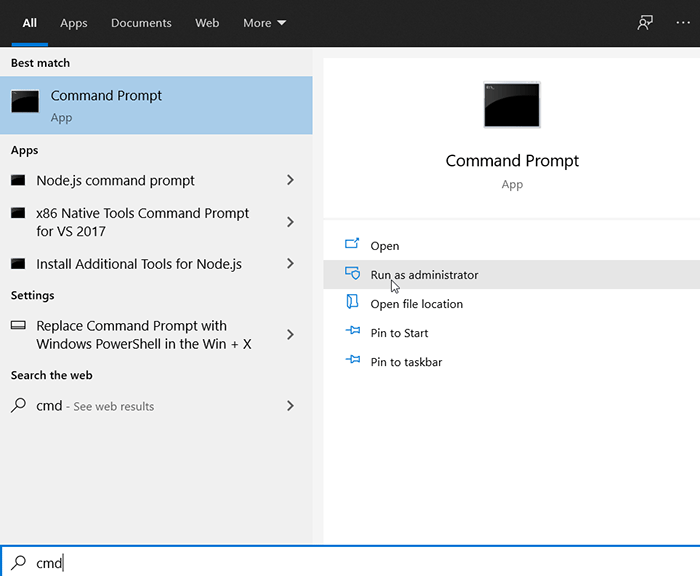
Command Prompt should show up as the best match. On the right side, click on "Run as administrator". User Account Control Window should show up asking you to confirm this. After clicking "Yes", the command prompt window should show up.
Inside the command prompt, first type the line shown below, so that we will be inside the Apache bin folder:
cd c:\apache24\bin
Once we are inside it, type the following command:
httpd -k install
If everything was successful, you should get the following message:
The 'Apache2.4' service is successfully installed.
Testing httpd.conf....
Errors reported here must be corrected before the service can be started.
This will add Apache as a service, but the service has not started yet.
Manage Apache service
The easiest way to control the Apache Service is by running ApacheMonitor.exe located in the same c:\apache24\bin folder.
After running this utility, you should see that the notification icon on the taskbar has been added for the ApacheMonitor utility. If you click on it, you can start the Apache service by going to Apache2.4 > Start. You can also Stop and Restart the Apache service the same way.
![]()
After selecting Apache2.4 > Start, the ApacheMonitor notification icon should now display in the Notification area as a tiny green arrow and if you hover over it, it should say "Running All Apache Services".
Adding ApacheMonitor.exe to a Windows Startup
It would be better if we make the ApacheMonitor.exe start with windows. Here are the steps:
- Go to
c:\apache24\binand create a shortcut forApacheMonitor.exe. - Type "run" in Windows Search and open the "Run" App.
- "The popup window will show up. Type the command "shell:startup" as shown below and press enter:
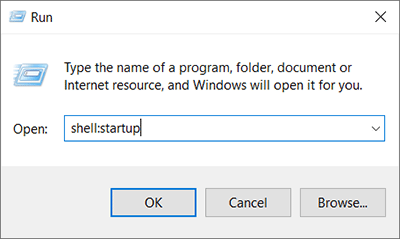
- This will open the File Explorer in the "Startup" folder.
- Copy the shortcut we created earlier to this folder.
Now, every time your Windows start, the ApacheMonitor.exe should also start.
So far we have a Web server that is able to process PHP files. Next, let’s install the MySQL database.
3. Install MySQL database
WordPress also uses MySQL database, so we are going to install the MySQL Community database on our Windows machine.
Downloading the MySQL
Go to MySQL download page. There should be two installers available for downloads. One is a much smaller web online installer which is handy if you have a slow internet connection as it will download only stuff you need. The other one is an offline installer with all the features and due to that is a much larger file. Choose whichever you prefer and click "download".
You should now see the following page.
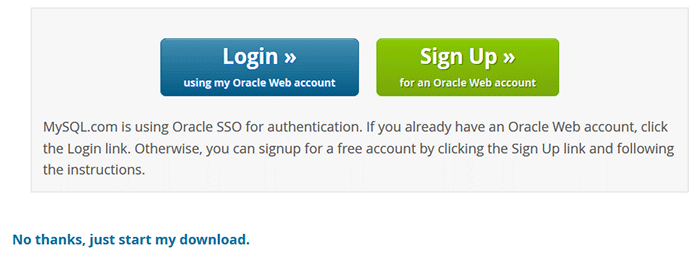
Simply click on the "No thanks, just start my download." link.
Run the MySQL Installer
After the download is complete, run the installer. User Account Control Window should show up. Check that the verified publisher is "Oracle America, Inc." and click "Yes". MySQL Installer window should open. The installer consists of the following steps as shown below:

- Choosing a Setup Type
In the first step, we need to choose a setup type. If you choose "Developer Default", it will install MySQL server and additional products, such as MySQL Shell, MySQL for Excel, MySQL for Visual Studio, but for our purposes of running WordPress, we really only need MySQL server, so choose "Server Only" and click "Next".Note: If it prompts you to install "Microsoft Visual C++ 2015-2019 Redistributable", add a checkbox to agree with the license terms and click "Install". - Installation
In this step, you should see a list of products that will be installed. There should be "MySQL Server" product with the status "Ready to install". Click on "Execute". If successful, there should be a green checkbox next to the "MySQL Server" product with the status "Complete". Click on the "Next" button. -
You should now be at "Product Configuration" step. In this step, we configure the products that we just installed, in our case, this would be MySQL Server with the status "Ready to configure". Click on "Next".
On the left sidebar, you should now see steps to various configuration options.

- Type and Networking
Config Type should be already set at "Development Computer". If not, set it and click "Next". - Authentication Method
Here, we choose the recommended "Use Strong Password Encryption for Authentication" option. The other "Use Legacy Authentication Method (Retain MySQL 5.x Compatibility" is needed for PHP 7.2 or lower, but we used the latest PHP version which is currently PHP 8. -
Accounts and Roles
Here, choose a root password. Make sure that after typing and repeating the password you get the message "Password strength: Strong" and click "Next". - Windows Service
Leave everything as it is. This way, MySQL will run as a service. Click "Next". - Apply Configuration
Here, you will see a list of steps, the configuration needs to perform. Click on "Execute". This shouldn't last long (at most not more than a few minutes). When finished, if everything went without issues, all the steps should display green checkboxes. Click on the "Finish" button. - Product Configuration
You should now see the "MySQL Server" product with the status "Configuration complete". Click "Next".
- Type and Networking
- Installation Complete
When we reach this step, the installation is done. We have an option to copy the installation log to the clipboard. Click "Finish".
After installation is completed, the MySQL Server should now run in the background of your system as a Windows service.
About MySQL configuration file
Before we go to the next step, let's talk about the MySQL configuration file for a moment. Similar to Apache, the MySQL Server also has a configuration file named my.ini where we can change & add various settings. For MySQL Server 8.0, the file is located at \ProgramData\MySQL\MySQL Server 8.0\
Default settings in my.ini file are fine and we don't need to change anything, but it is always good to know the location of configuration files in case we need to change settings in the future.
In the next step, we are going to install a small utility MySQL Notifier utility to easily manage the MySQL service.
3.1. Download MySQL Notifier utility
During installation, we chose the default option to run MySQL Server as a Windows service. In order to easily stop / start / restart this service, we can download the MySQL Notifier utility. Click on the "Download" button, save the file and run the installer.
When we install it and run MySQL Notifier, a notification icon will appear on the taskbar from which we can easily stop, start or restart the MySQL server as shown below:
![]()
4. Install phpMyAdmin tool
With a working MySQL server, we need to know how to manage MySQL databases and database users. For this purpose, we are going to use the PhpMyAdmin, a MySQL management tool written in PHP that we run on a browser from our localhost.
Download the phpMyAdmin
Go to the phpMyAdmin website and download it by clicking on the green "Download" button. Extract the downloaded file into your localhost root server folder.
About phpMyAdmin configuration file
The phpMyAdmin tool also has a configuration file named config.inc.php, but after extracting the files you will notice that it's missing. We are going to use a sample configuration file named config.sample.inc.php, so open that file in the text editor.
Find the following line:
$cfg['blowfish_secret'] = '';
We need to put a random 32 characters long string as a value to this configuration setting. We can use this online tool that generates the $cfg['blowfish_secret'] containing the random secret. Copy this generated code and save the file as config.inc.php.
Run the phpMyAdmin tool
To run the phpMyAdmin, open the browser and go to the following URL shown below. The X.X.X should be replaced with the phpMyAdmin version you are using.
http://127.0.0.1/phpMyAdmin-X.X.X-all-languages/
If everything worked as it should, the phpMyAdmin will ask you for the login information:
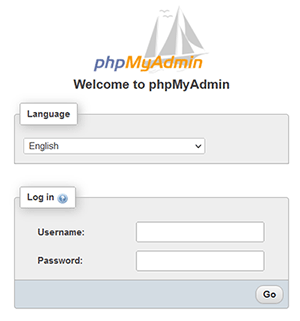
Use the root as username and password that you picked when MySQL was configured.
The phpMyAdmin dashboard should now show up:

Possible Errors
The phpMyAdmin needs a PHP mysqli extension for it to work. We enabled this extension when we configured php.ini file at the beginning of this article when we modified the php.ini file. If it’s not enabled, we get the following error:
The mysqli extension is missing. Please check your PHP configuration.
5. Install WordPress
If you went through all the steps above, you should now have the Apache server, MySQL database, and phpMyAdmin tool installed. All that is left is to install WordPress.
First, download the WordPress, save the file on your system and extract it at your root server folder.
Before we try to run the WordPress from our localhost, we need to make a MySQL database for our WordPress website and also create a database user that will have permission to this database.
5.1. Creating a Database and Database user for WordPress
We will use the phpMyAdmin tool to create a database and a database user for our WordPress website. The steps are as follows:
- Run the phpMyAdmin tool from our root server folder and login by using your MySQL login credentials.
- Once inside the phpMyAdmin dashboard, click on the "Databases" tab. Under the "Create database", there will be a text field. Type a database name you want to use and click on the "Create" button.
- After database creation, your tabs will change to manage this database. Click on the "Privileges" tab to manage database users for this database.
- Here, you should see the list of existing database users. We will create a new user. Click on the "add user account" link.
- Under "Login Information", we need to set:
- Username
Give it a name, for example, mywpuser. Remember it as we will need it later when we install WordPress. - Host name
From the dropdown, change from "Any host" to "Local". - Password
Choose a strong password. The easiest way is to click on the "Generate" button located below the "Password" field. It will generate one for you. This password will be used when we will install WordPress, so save it temporarily somewhere on your computer.
- Username
Now scroll all the way down and click the "Go" button located on the bottom right corner to save the settings. If everything went without issues, you should see the green "You have added a new user." message.
We have now created a WordPress database that is currently empty and also created a new database user account for this database. Both will be used in the next step.
5.2. Running WordPress Installation
To install WordPress, we first navigate to the URL of the folder with extracted WordPress files in our localhost which in our case should be:
http://127.0.0.1/wordpress/
This should redirect you to:
http://127.0.0.1/wordpress/wp-admin/setup-config.php
There are several steps we need to go through.
- In first step, we select the language that will be used in the Dashboard (back-end) and is not related to the language your Website will be having (front-end). Select a language and click on "Continue" button to go to the next step.
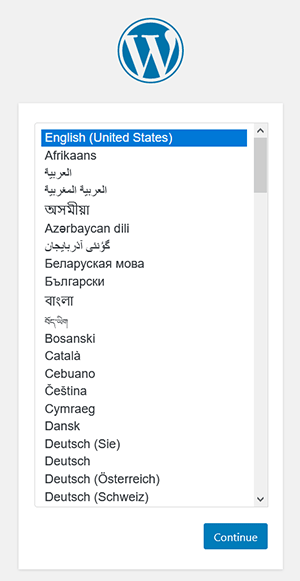 Note: Check this WordPress official page to learn more about WordPress and languages for both front-end and back-end.
 - Now, we are going to see a page with a bit more explanation on how the installation will proceed. We are going to fill out the database information and they will be saved into a configuration file named
wp-config.php. We created those database credentials from the previous section when we were inside the phpMyAdmin tool. Clicking on "Let’s Go!" will move us to the next step.
Note: If you are not seeing this page, but was instead moved to step 5 of the installation, it means that thewp-config.phpconfiguration file already exists in the WordPress root folder. To modify the database credentials, simply edit thewp-config.phpfile in the text editor. - In this step, we are going to fill in the database information:
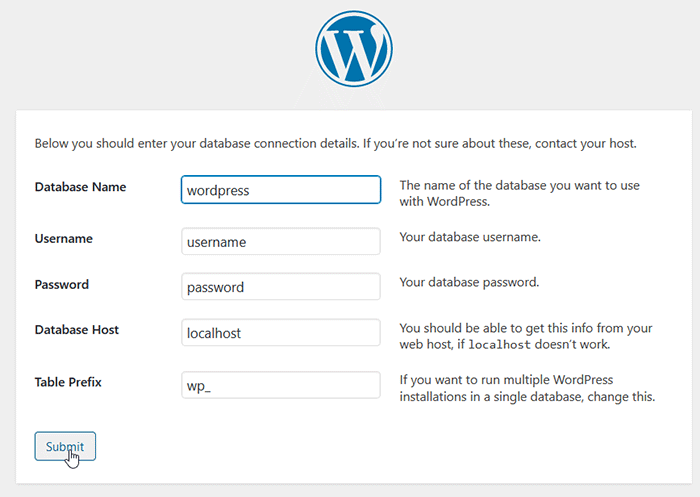 We need to fill the fields shown above.
- Database Name
- Username
- Password
For the Database Name, Username & Password, enter the values used when we created the database earlier using phpMyAdmin.
- Database Host
Leave it at localhost as the database is on the same machine. - Table Prefix
Leave it as it is. This will add a prefix wp_ to the database tables generated with this installation.
Click the "Submit" button. This information will be saved in
wp-config.phpfile inside the WordPress root folder. If we need to modify any of these settings again in the future, we edit thewp-config.phpfile in the text editor. - If everything was entered correctly, WordPress should now be able to communicate with the database and we should see the message shown below:
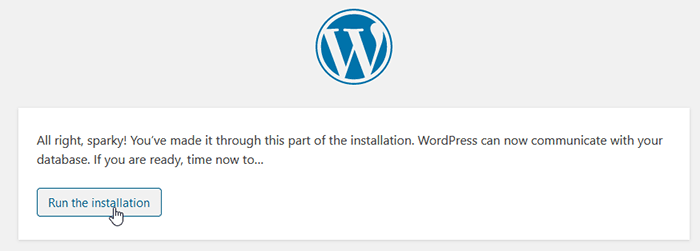
Click on the "Run the installation" button to continue to the next step.
On the other hand, if there is an issue and WordPress cannot establish a database connection, you might get one of the following errors:
- Error establishing a database connection
This error will contain the following message:
This either means that the username and password information in your wp-config.php file is incorrect or we can’t contact the database server at localhost. This could mean your host’s database server is down.- Are you sure you have the correct username and password?
- Are you sure you have typed the correct hostname?
- Are you sure the database server is running?
Open the
wp-config.phpfile inside a text editor and check if the database name, database username, and database user password is the same as the one you used when creating database using phpMyAdmin earlier. Also, check if the MySQL is running by using the MySQL Notifier utility we installed in the previous section. - Fatal error: Uncaught Error: Call to undefined function mysql_connect()
Check if you have the mysqli extension enabled in the
php.inifile. We modified this file at the beginning when we were installing PHP. - There has been a critical error on your website.
Similarly as with the previous error, first check if the mysqli extension is enabled in the
php.inifile. If this is not the issue, check this article about the critical error during WordPress installation.
- Error establishing a database connection
-
In this step, we now need to fill in the information regarding the WordPress website.
 Note: Everything here can be later changed in the dashboard except for username. To change the username, we can use the Easy Username Updater plugin.
We will set the following:
- Site Title
- Username
- Password
The username and password we enter here are the login information for the administrator user and are used to login into a WordPress Dashboard. Don't confuse them with the database username and password.
- Your Email
We also need to fill the email and can be used for password reset of the administrator account, but for the email to work, we also need an email server running.Note: If you forget your password on your local machine, check this official WordPress page that shows you different ways to reset the password. - Search engine visibility
There is also a "Search engine visibility" checkbox, but this is used when a website goes live, so we can ignore this. In our case, the Apache only listens to 127.0.0.1:80, so it’s unreachable by search engines.Note: For live websites, do not rely on this checkbox to make your website hidden from search engines as it is up to search engines to honor this option. If you wish to limit who can see the website, you could use a plugin such as Restricted Site Access.
Click "Install WordPress" to continue.
- If the installation completes successfully, you should see the following page:
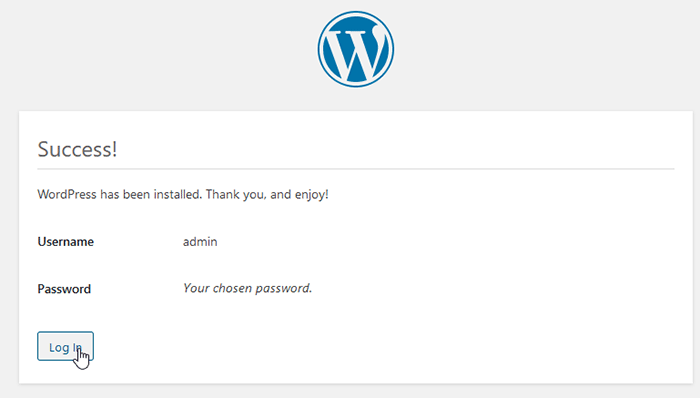
Click on "Log in" button.
- You should now see the default WordPress login page:
 Note: To access the admin dashboard in the future, add
/wp-admin/path to the end of the URL of your installed WordPress website.After successful login, you should see the dashboard as shown below:
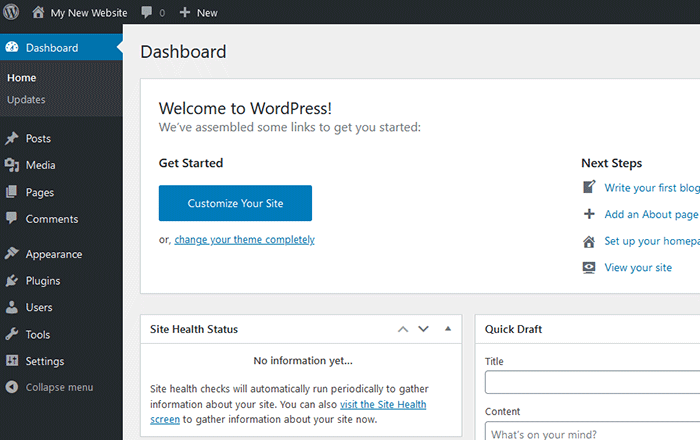
If you made it this far, Congratulations. You are now running a WordPress website locally on your Windows machine.
Conclusion
In this article, we learned how to run WordPress locally on Windows systems. We had to first install PHP, Apache server, and MySQL database. For easy management of the MySQL database, we installed the phpMyAdmin tool and for easier management of the MySQL service, we installed MySQL Notifier utility. After that, all that was left was to install WordPress.

James
September 9, 2021hi,
Thank you a ton, I just tried xamp, and it didn't work, but your instructions were amazing, now I have a local wp up and running.
Appreciate all the time it took to write this up for us!
Simon.Hsu
September 25, 2021Hello!
Thank you for your article and your time, the steps are very clear, I also created WordPress with success.
Kenny
October 21, 2021Thanks for this article. Do you have something about hardening this setup?
admin
October 22, 2021Hi,
This article is meant for local development, so securing the system was not the focus. If I was running a live server, I would use IIS on Windows instead of Apache.
Miklós
January 3, 2022Hi,
Thanks for the article, it was very helpful!
Michael Red
April 27, 2022Hello, you are a CRACK this guide work like a Charm. This is my first time in web developing world and now i have my first web in developing process thanks to you. I be very gratefully.
I was having troubles with php_mysqli.dll, it dont worked at first, but i edited php.ini many times until it worked.
Thanks Very Much.
Jameel
May 30, 2022I'm having difficulties logging in to phpMyAdmin.
admin
May 30, 2022Hi, do you get any specific error when the login fails?
You could also try solutions listed in this StackOverflow question.
apple1013
June 22, 2022Big help! Thank you!
Jameel
July 9, 2022no no I'm still not able to login to phpMyAdmin. it shows something like:
mysqli::real_connect(): (HY000/1045): Access denied for user 'root'@'localhost' (using password: YES)
admin
July 9, 2022In
config.inc.php, try changing the following line:$cfg['Servers'][$i]['auth_type'] = 'cookie';to
$cfg['Servers'][$i]['auth_type'] = 'http';Jameel
July 11, 2022I am still not able to login. I used 'root' as username and the password I used when configuring mysql.
admin
July 11, 2022I would try to test the MySQL password inside a terminal to see if it really works.
Try finding the location of mysqladmin command. I have it at
C:\Program Files\MySQL\MySQL Server 8.0\binThen open cmd on that location and run the following command:
mysqladmin -u root -p versionIt will ask for a password. Enter it. If it works, you should see information about MySQL Server and it would mean there is nothing wrong with the MySQL database but there is a problem with phpMyAdmin.
Jan G
July 28, 2022I've followed all these instructions but the test.php isn't found. I checked the php version in the console and this returns the appropriate response with no errors apparent. Is this likely to be an Apache or PHP error? Any clues what I could have missed?
admin
July 30, 2022Hi,
Try opening the console at the location of the test.php file and then run the PHP command:
php test.phpIf it displays "hello world" then the PHP works fine and it is the Apache issue.
What happens when you go to
http://localhost/and what are your values for the DocumentRoot and Directory directives in the httpd.conf file?Wayne Mc
August 15, 2022Thank you for all these carefully prepared instructions. I have successfully made it to the WordPress install. The files are unzipped under c:\Apache24\htdocs\wordpress. When I try to load the page, expecting it to redirect and ask for setup information, it times out at 30sec, having displayed nothing. The log file simply says error timed out at 30 sec. It tells me on screen there has been a critical error, but that is just the error message to go with the timeout. If traced it redirecting successfully into setup-config.php but have not yet been able to work out where it is getting lost.
admin
August 15, 2022Hi,
I had similar issue and made an article about having critical error during WordPress installation. In my case, it was due to "max_execution_time = 30" option in the
php.inifile and increasing it to "max_execution_time = 120" fixed the issue for me.Wayne Mc
August 15, 2022I made the change to 120 seconds and it timed out after 2 minutes. Sadly not the same problem as you had.
Wayne Mc
August 15, 2022It turned out to be my VPN. I have paused the VPN service and it proceeds as it should on to choosing locale. I tried adding an exception to the VPN service but the localhost wiordpress install is not accepted as a valid website. Anyway I'm unstuck, and maybe this is a catch worth adding (unles it's already there and I missed it). Thanks for your assistance, and again for all your instructions on this page.
admin
August 15, 2022Very interesting. Thanks for letting us know what the issue is. You could try to add an exception to
api.wordpress.orgas this is the URL that is probably getting blocked.Wayne Mc
August 15, 2022I have traced it into
translation-install.php -> translations_api(). It reaches the line (around line 60) which reads$request = wp_remote_post( $url, $options );$url is set to https://api.wordpress.org/translations/core/1.0/ and $options using
print_r()is Array ( [timeout] => 3 [body] => Array ( [wp_version] => 6.0.1 [locale] => en_US [version] => 6.0.1 ) ).It doesn't return from this call. If I enter https://api.wordpress.org/translations/core/1.0/ into a new tab in the same browser, it immediately returns me a json list of translations, so it is neither the url nor my internet connection. It just doesn't seem to relate to anything in the setup so far. I can't see it being discussed so it doesn't seem to be an issue others have. Any thoughts?