This article is intended for beginners and will demonstrate how to create a Windows Forms / WinForms project using Visual Studio 2019 Community Edition, which is a free version of Visual Studio. The WinForms application created by Visual Studio will contain only a main form with no controls. Then in the future article, we will make this application a bit more interesting and useful.
Before we start creating a Visual Studio project, we need to make sure that the Visual Studio we have installed in our system is able to create WinForms projects.
What about creating a WinForms Project using Visual Studio Code?
I'm a big fan of Visual Studio Code and I did wonder if it's possible to create WinForms project with it. Visual Studio 2019 added the Windows Forms support to the .NET Core 3.0 Framework, so maybe it will be possible in the future, but at the moment, the answer is No as there is no VS Code extension available and there is no support for the WinForms designer.
Making sure the .NET desktop development workload is installed for Visual Studio
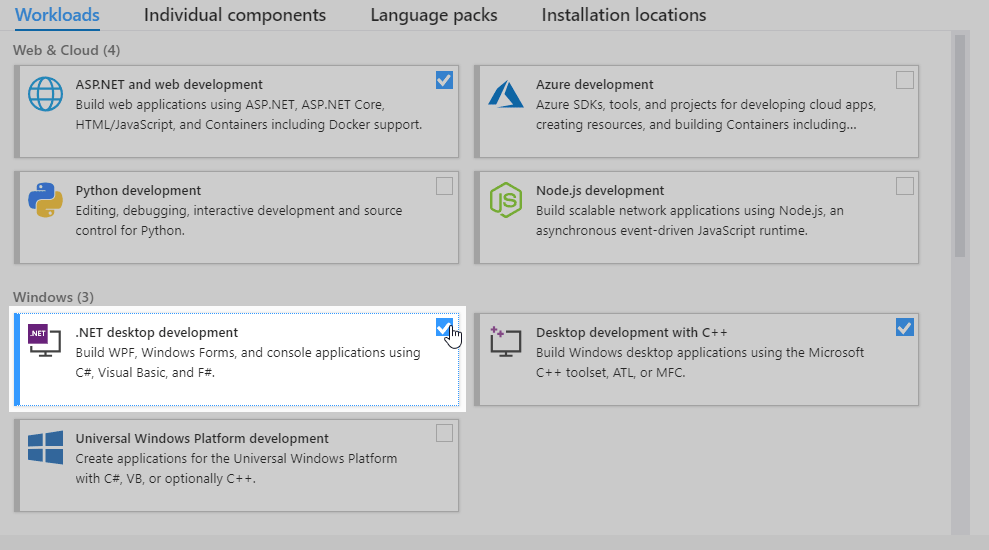
It is assumed you have installed the Visual Studio Community 2019 in your system and that you have selected the ".NET desktop development" workload during the installation.
If you need to install Visual Studio Community Edition, make sure that during the installation, you select the .NET desktop development workload as we are going to create a WinForms project using the standard .NET Framework.
Modifying the existing Visual Studio installation
If you already have Visual Studio installed, but you are unsure if a desktop application workload is installed or not, go to the next step to create a new project in VS. If you will see WinForms templates available, you are good to go.
If WinForms templates are missing, no problem, you should be able to easily add them by modifying the Visual Studio installation using these steps:
- Go to Settings > Apps (in Windows 7, go to Control Panel > Programs & Features).
- From the list of apps, find the Visual Studio Community app.
- Click the Modify button.
- After clicking on Modify, the installation window should appear as shown on the image shown earlier. You need to add a checkbox for the ".NET desktop development" workload. Note that this workload might take up to 5GB of HDD space, depending on what is missing.
Now, let's create a WinForms project in VS.
Creating a WinForms Project in the Visual Studio
The steps to create a new WinForms project are as follows:
- Start the Visual Studio. After a while, the following window should show up:
Click image to enlarge
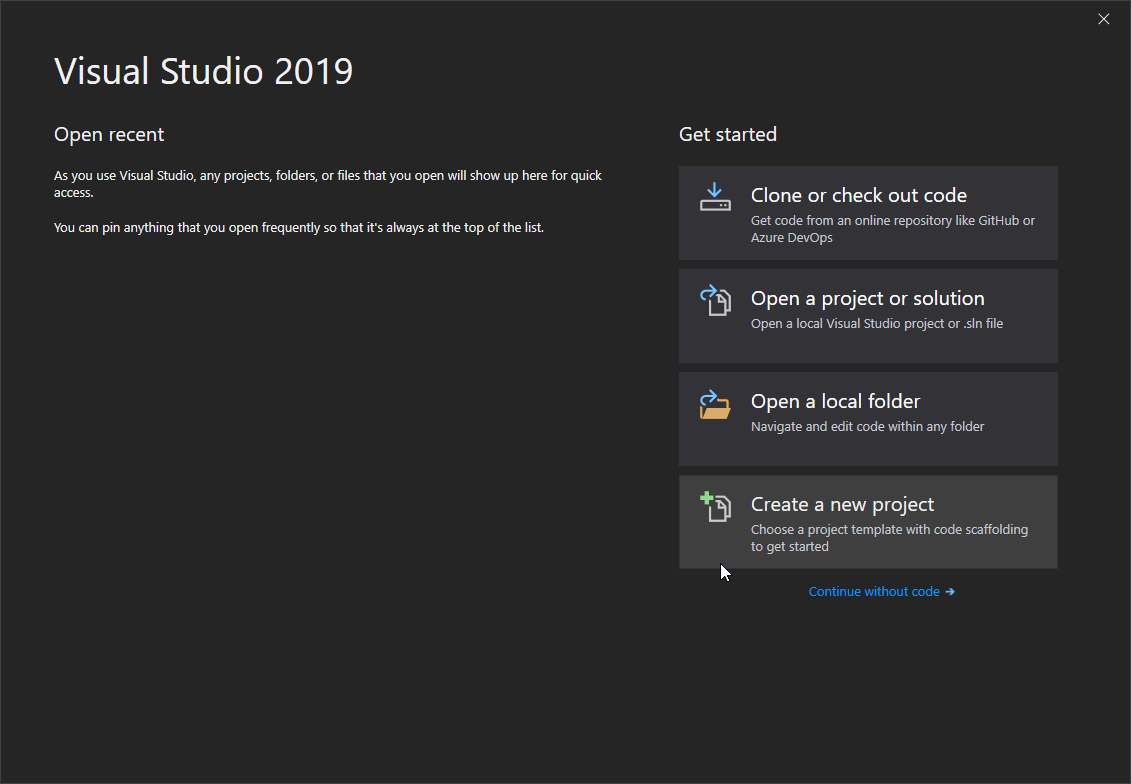
On the left side, you will have a list of the recently used project's and on the right side, you will have several buttons to get started. Click on the "Create new project".
-
This brings us to the window shown below, where we choose the template we want to use for our new project. On the left side we will have a list of the recently used templates and on the right side, we will have a list of all available templates.
We want to create a WinForms project, so inside the search field, type "winforms". Now, only the WinForms related templates should be listed:
Click image to enlarge

Select the "Windows Forms App (.NET Framework)" template. You might see two of them, one for C# and one for Visual Basic. We will use C#, so select that one and click "Next".
Note: If you want to check out all the templates in your Visual Studio that are available for the the desktop projects, select "Desktop" under the "Project type" drop-down menu.What if WinForms template is missing in Visual Studio?
if you are unable to find the WinForms template, it usually means that during the Visual Studio installation, the .NET desktop development workload was not selected. Not to worry though, we can easily add additional packages by modifying the existing installation. Just follow the steps in the first section of this article.
-
Now that we selected the WinForms template, the "Configure your new project" window will appear:
Click image to enlarge
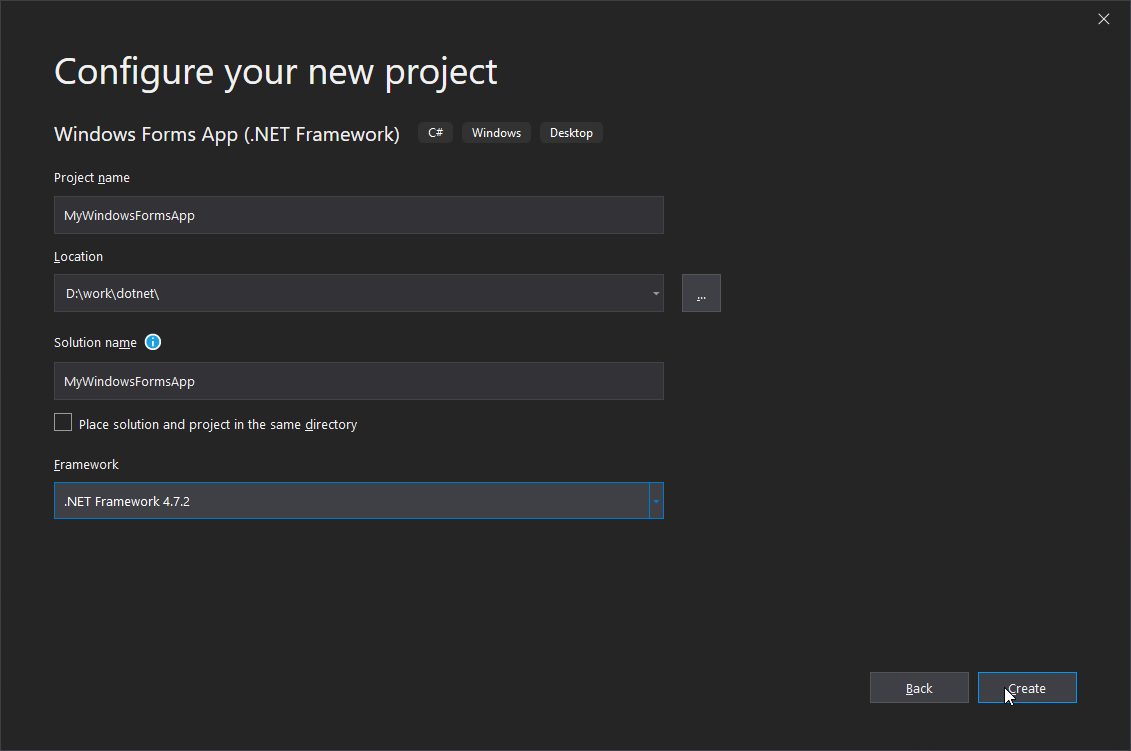
Here, we can choose our Project name and Location of the project. I'll name it "MyWindowsFormsApp". Notice that your solution name will also be set to the same name. We can change the solution name to something different, but solutions are used to group different projects together and, in our case, we only have one, so we can leave it as it is.
Leave the .NET Framework as it is and click on "Create" button.
After some processing, the Visual Studio should create a new Windows Forms project and it should look something like this:
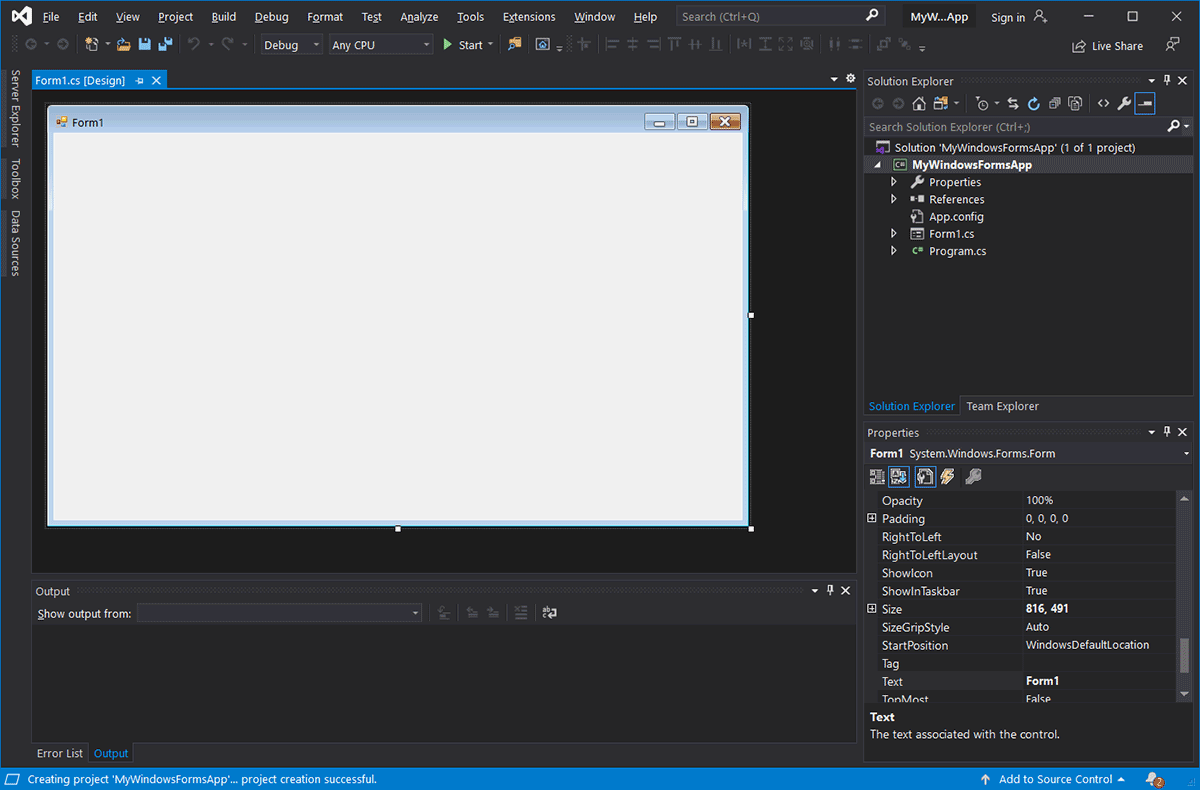
Now, let's quickly explore the opened project in VS.
Exploring the created WinForms project in Visual Studio
As you can see from the image above, we have an open tab named Form1.cs [Design] containing the main form of the project. The [Design] in the name tells us the Form1.cs is opened in "Designer mode", so we can drag & drop other controls to the Form and setting properties to those controls or the form itself.
The WinForms project created by Visual Studio auto-generates enough code for us to start the desktop application. We build and run the project in different ways:
- By clicking on the green "Start" button located in the Visual Studio Toolbar section.
- By pressing F5.
- From the menu by going to Debug > Start Debugging.
The running project will consist of our main form as shown below.
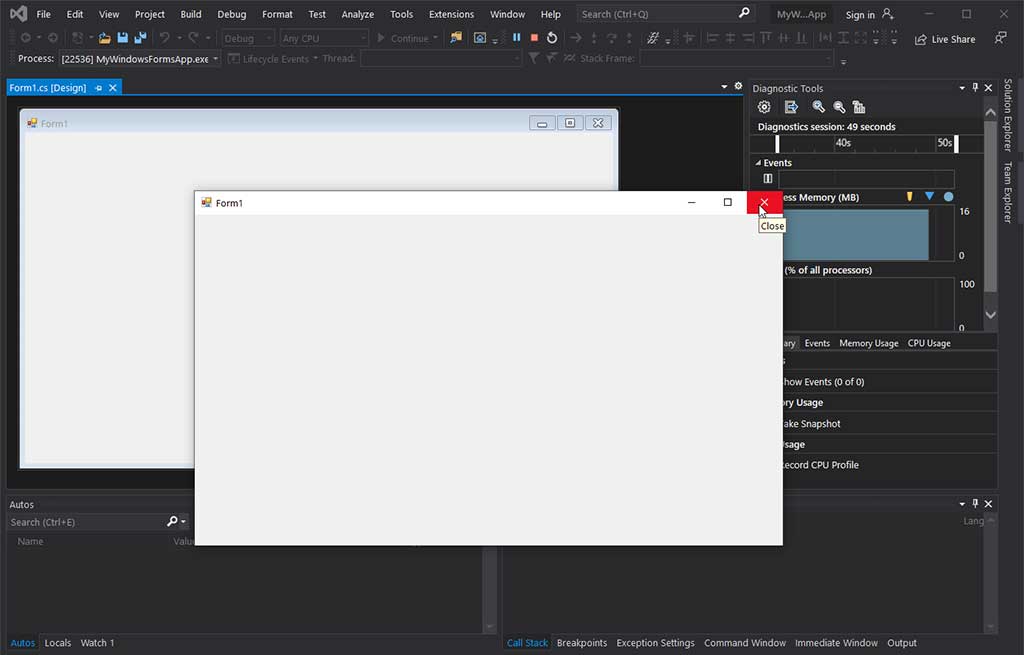
By clicking on the red X close button on the top right corner of the Form1 windows, the application will close.
In the future article we will learn how to add additional WinForms controls into the main form and make the desktop application a bit more functional by adding a button to it that will display a pop-up window when clicked.
Conclusion
In this article we learned how to create WinForms project using Visual Studio and what to do when the WinForms templates are missing in Visual Studio. After the WinForms template was chosen, we configured a project by giving it a name and the location of the project. Finally, with the Windows Forms project in VS successfully created, we learned how to build and run it in three different ways.
